Salesforce Certification Maintenance Exams Spring 2019

        Here we are covering major features of Spring 19 release that are part of maintenance exams for different Salesforce certifications

Lightning Web Components(LWC)

        Salesforce introduced new lightning web components or LWC. It is another front end framework with lot of differences with Aura framework. LWC is way faster than Aura and uses modern web technologies like “Web Components” that got standardized after Aura was released in 2014. Aura and LWC components can coexist and admins will not see a difference in the way both operate.

Changes to Rich Text Editor

        Historically Salesforce was using CKEditor(open source) to show rich text field available in Salesforce interface. Now Salesforce is using another open source library called Quill to do this. This is because Quill plays better with locker service.

New Flow Builder

        Salesforce is replacing it’s old flow builder (called cloud flow builder) with new simplified graphical tool called Flow Builder. New interface is way more intuitive and you can access it while creating new flows or editing existing flows.

New interface to setup Sales Process

        Sales Process in Salesforce allows you to customize different steps of your sales operation. Historically you needed to setup Lead process to define different status values in lead and Sales process to define different stage values and probabilities in opportunity. This was a time consuming process. New interface to setup Sales Process allows you to define both Lead Status and Opportunity statuses in one shot in a single wizard with side by side view of both statuses.

Joined reports for lightning experience

        This feature allows up to 5 report blocks to be viewed side by side in a single joined report. To use this feature,

  • Edit any existing report in Salesforce
  • Click dropdown icon next to “Report” option in the view top left
  • Select “Joined Report” from the drop down and apply
  • Use “Add Block” button to add new reports

Other features

  • Option to remove all Account team members in one shot.
  • Ability to promote sub tab in lightning workspace to a main tab or workspace tab
  • You can create “Account Relationship Data Sharing Rules” to share some standard objects and custom objects with partners
  • Ability to specify relative values using macros while populating Date, Time, DateTime field values. For example you can specify due date of a task as “n days from today” in macro
  • Ability to change template in a lightning page that is already created
  • Admins can control visibility of components in lightning page based on user’s permissions. For example if user has “API Enabled” standard permission, show a particular component.
  • While specifying default value of fields, now you can use values configured in custom metadata type.
  • There is a new clause “WITH SECURITY_ENFORCED” that you can add at the end of SOQL in Apex to enforce field level security check. Example “SELECT Id, (SELECT Id, FirstName FROM Contacts) FROM Account WITH SECURITY_ENFORCED” will fail if the user does not have view permission on FirstName field

Trailhead to complete for administrator certification maintenance

        https://trailhead.salesforce.com/content/learn/modules/administrator-maintenance-spring19

Trailhead to complete for Platform App Builder certification maintenance

        https://trailhead.salesforce.com/content/learn/modules/platform-app-builder-maintenance-spring19

Trailhead to complete for Platform App Builder certification maintenance

        https://trailhead.salesforce.com/en/content/learn/modules/platform-developer1-maintenance-spring19

Trailhead to complete for Data Architecture Designer certification maintenance

        https://trailhead.salesforce.com/en/content/learn/modules/data-architecture-designer-maintenance-spring19/maintain-your-data-architecture-designer-cert-spring19

Configuration - Step by step guide to setup entitlements and case milestones

   Entitlement processes and milestones are used to help an organization to adhere to service level agreements/SLAs while supporting customers. Basically you can define different support levels like Gold support level people are eligible to get issues resolved within x hours adhering to these milestones. You can follow below steps to complete configuration of entitlement process and milestones.

1) Make sure your user have "Service Cloud User" checkbox checked under user


2) Go to Setup -> Entitlement Settings, Check "Enable entitlement management" checkbox

3) Go to Setup -> Milestones, create a milestone

4) Go to Setup -> Entitlement Process, create an active entitlement process on Case object

5) Under the entitlement process add the milestone created in step 3, by click "new milestone" button in entitlement process view page

6) Now go to Entitlement tab(Not under setup. It is under regular tabs). Create an entitlement record for any account record. Here we are basically saying "Acme Testing" account is eligible for "Standard Entitlement" from x date to y date.

7) Now create a case for the Account and select this entitlement record in case. 

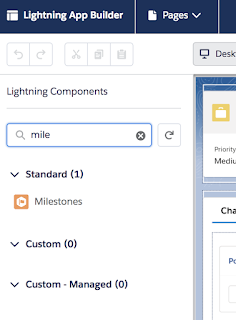
8) A Milestone also will be created automatically with the case. If you do not have "Milestone" standard component in app builder page, click settings icon -> Edit Page to edit the page and add milestone component to layout
Once the component is added to the app builder page and page is activated, you can see time remaining in the milestone in case details page
  

How to show a commandline/terminal menu

You might have seen a lot of command line tools offering a small menu with a number of options to choose from. Also you might have written some bash scripts that you want to make available in your terminal as a menu. Here you can find a good example to get started.

Sample


This menu sample code is organized into three main chunks. "show_menu" function takes care of styling and displaying options. option_picked function is used to show the option selected in a different color. Finally there is a while loop that is used to show the options continuously til you exit by hitting just enter.

Use cases

For an example, in Salesforce context you can use this script as a starter to get started with Salesforce DX commands. Salesforce DX commands are notoriously long and difficult to remember. You can setup a bash script with different options and user friendly labels. Then using the sample menu you can invoke necessary sfdx commands.
As final step you can alias the path to the bash script in you ".bash_profile" file. This will let you call your utility script anytime from terminal without worrying about path.

alias heydx="sh /Users/myname/Documents/Scripts/dxUtility.sh"

Apex Batch class template

Batch classes are used to process very large volume of data without hitting Salesforce governor limits. Batch classes should implement "Database.Batchable" interface and it has three methods that must be implemented. 

Start

This method executes only once at the start of the batch. It queries all the records that needs to be processed and passes a Database.Querylocator or an iterable of objects to next execute method.

Execute

This method gets executed multiple times for one batch invocation. The total number of records that need to be processed from start method is divided into small chunks of batch size(default is 200) and for each chunk execute method is executed one after another. Since each of these chunks get separate execution context, you get separate governor limits for each chunk.

Finish

This method gets executed once at the end of the batch. ie after all individual execute chunks are complete. This is usually used for post processing activities like sending email notifying admin that batch executed successfully. 

Sample - Batch to update number of contacts to account


Common use cases for apex batch classes are below,


  1. Process bulk data that cannot be processed in single execution due to governor limits. For example making updates to more than 10k records.
  2. If regular execution is hitting heap limit, usually we need to go for batch/future class. Regular heap limit is 6MB. But in asynchronous execution methods like batch or future classes we get a 12MB heap limit
  3. Making thousands of callouts. Suppose you have to get some details about your accounts from an external system by hitting a webservice during night. You can make only 100 callouts in one transaction.  
  4. Send custom emails(with complex data from multiple objects which is not possible with workflow) to multiple people from apex. Keep batch size 10 as salesforce allows only 10 outbound emails in single transaction
  5. Make more than 10 Future callouts. Here also keep batch size as 10 because salesforce allows only 10 future callouts in one transaction.

How to comment your apex code (sample templates)


    Commenting your code well is very important for maintenance of your code. In software field it is very common for developers to change jobs very often. So it is very important to keep the code maintainable and understandable with good comments.

Things to Notice

Primary intent of comments is to make your code self documenting

    At a minimum add class and method level comments explaining what is the purpose of the class/method. Additional comments should be added on places where explanation/clarification is required.

 Don't overdo it

    We can see people adding comments every line or every other line. That is also unnecessary. It just makes reading through code more time consuming. Please keep in mind, intent of comment is to make somebody understand what is going on in code. Add granular details only if you feel an average developer might need comments to understand the logic.

Samples

You can use below sample templates as class and method level comments,
Class level comment
Method level comment

These examples follow ApexDoc syntax requirements. ApexDoc is a java application that is used to generate code documentation from code comments. It follows Javadoc style. If you are following the ApexDoc comment pattern, you will be able to generate static HTML documentation from the code by following instructions in ApexDoc documentation. You can find ApexDoc source and instructions in the repo - https://github.com/SalesforceFoundation/ApexDoc